If you’re an N64 fan, then you’re in for a real treat! Combining RetroPie with a trusty Raspberry Pi will make your retro gaming dreams come true.
This dynamic duo of RetroPie and Raspberry Pi transforms your modern device into a powerhouse capable of emulating the N64. Imagine having access to your beloved N64 games, all in one place, just a few clicks away. No more digging through dusty old boxes to find your cartridges or blowing on them in hopes they’ll work.
With this RetroPie N64 setup guide, you can experience the thrilling worlds of Super Mario 64, The Legend of Zelda: Ocarina of Time, and countless others on one powerful, tiny device!
Requirements
- A Raspberry Pi – I recommend getting hold of a Raspberry Pi 4 for N64 emulation
- Download and Install RetroPie – Download RetroPie Here
- A keyboard and mouse – If you plan on using your Raspberry Pi to download BIOS files and ROMs
- Have at least one N64 game ROM ready to test – The lr-mupen64plus core accepts the following file extensions – .z64 .n64 .v64 .zip
- To play games on RetroPie you will of course need a controller – The 8bitdo Pro 2 Bluetooth Controller is one of the best RetroPie controllers and an excellent all-arounder for emulation and can also be connected by USB for even better performance in terms of latency
Step 1 – Boot Your Raspberry Pi
The N64 emulator core ‘lr-mupen64plus‘ comes preinstalled as part of the prebuilt RetroPie setup, so you should not have to install it manually.
Should you find that for some reason the N64 emulator is not installed, then follow the below steps:
- Go to the RetroPie options menu and select ‘RetroPie Setup’
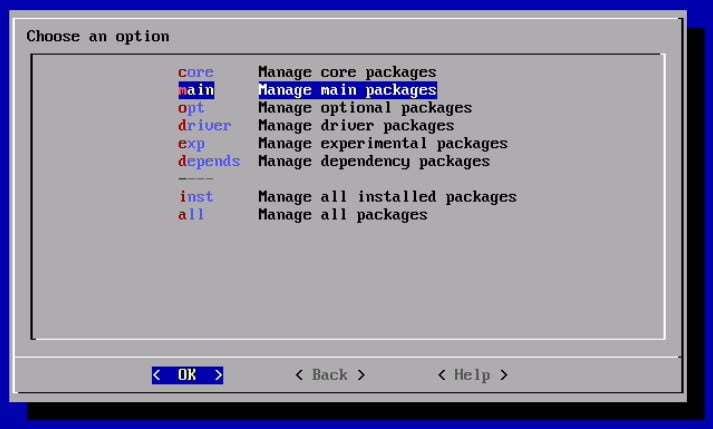
- ‘Manage packages
- ‘Manage main packages’
- Scroll down and select ‘lr-mupen64plus’
- Finally, select ‘Install from pre-compiled’ binary’
- RetroPie will then download and install the N64 emulator
- Navigate back through the menu and then select ‘Exit’
Step 2 – Copy N64 ROM Files To ‘roms’ Folder
Now you will need to copy at least one N64 game ROM file to the RetroPie ‘roms’ folder.
There are several ways you can do this, here are a couple of the easiest ways to get these files copied to your RetroPie roms folder.
Using Your Raspberry Pi To Move ROM Files
In order to access desktop mode on your Raspberry Pi RetroPie installation, you will need to make sure you have the ‘Pixel’ desktop environment’ installed. This is easy to do.
Simply access the RetroPie options screen and select ‘RetroPie Setup’.
- RetroPie Setup (Access this from the RetroPie options menu)
- Configuration / Tools
- Raspbian Tools
- Install Pixel desktop environment
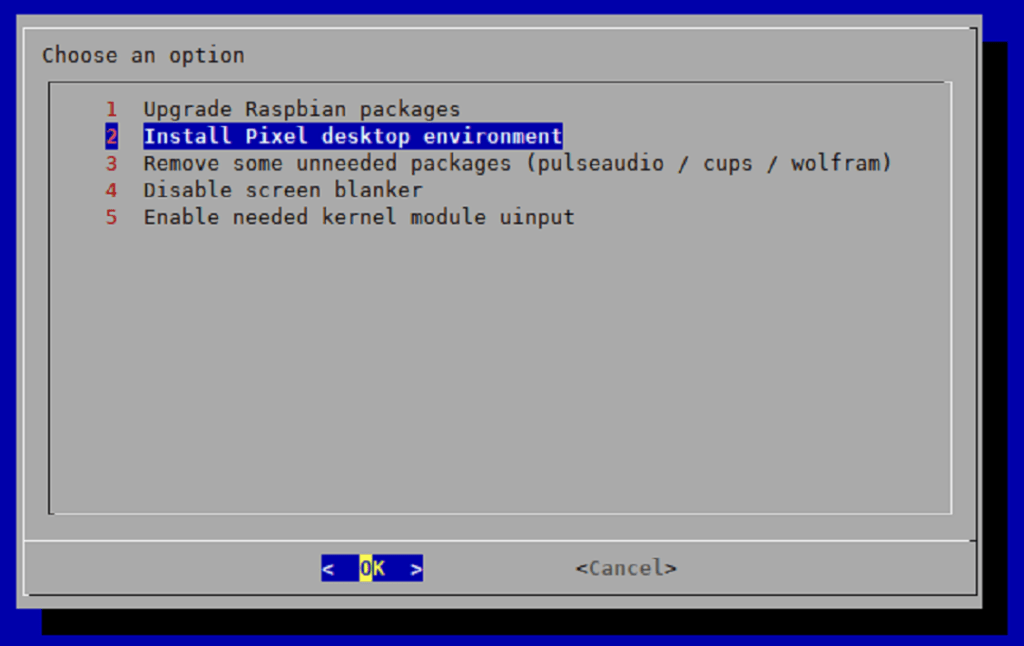
Once the Pixel desktop environment has been installed, reboot your Raspberry Pi and then you can access desktop mode by scrolling in RetroPie to ‘Ports’ and then selecting ‘Desktop’.
This will then launch desktop mode where you can access your Raspberry Pi’s directories and files like a normal PC.
You will then need to copy your N64 ROMs to the below location:
/home/pi/RetroPie/roms/n64/
Remotely Accessing Your Pi From A Windows PC
If you have a Windows PC, then this is the easiest way to get files across to your Raspberry Pi.
First of all, ensure that your Raspberry Pi is connected to the same network as your PC, then open up Windows file explorer and type ‘\\retropie‘ in the address bar.
Ensure that your Pi has been switched on for a minute or two as it sometimes takes a little time to appear on the network.
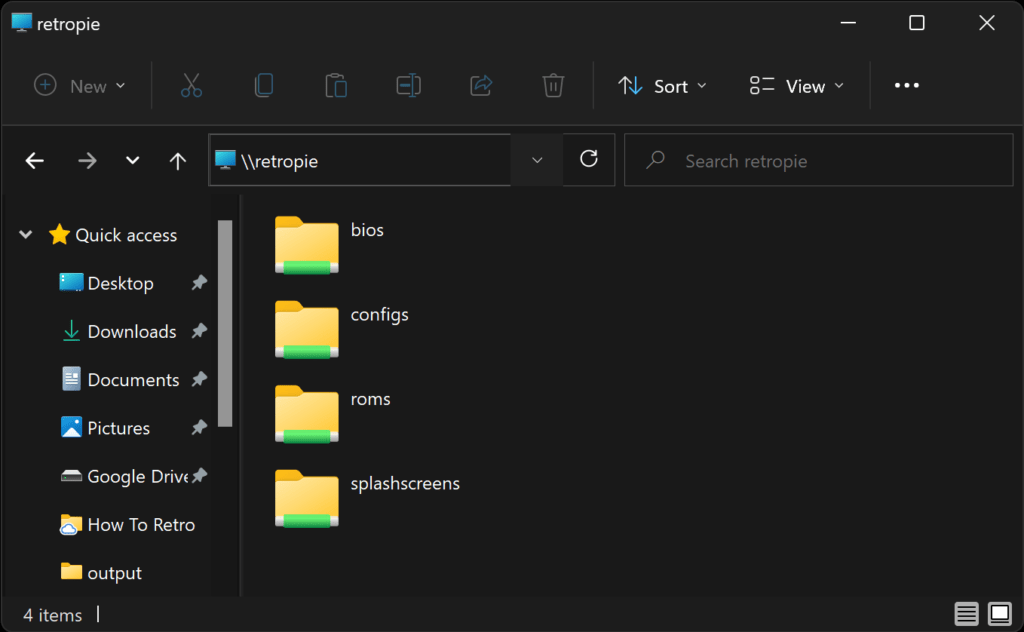
This should then connect to your Raspberry Pi and you will be able to see the ‘roms‘ folders amongst others.
Simply then copy your files from your PC to these folders on your Raspberry Pi.
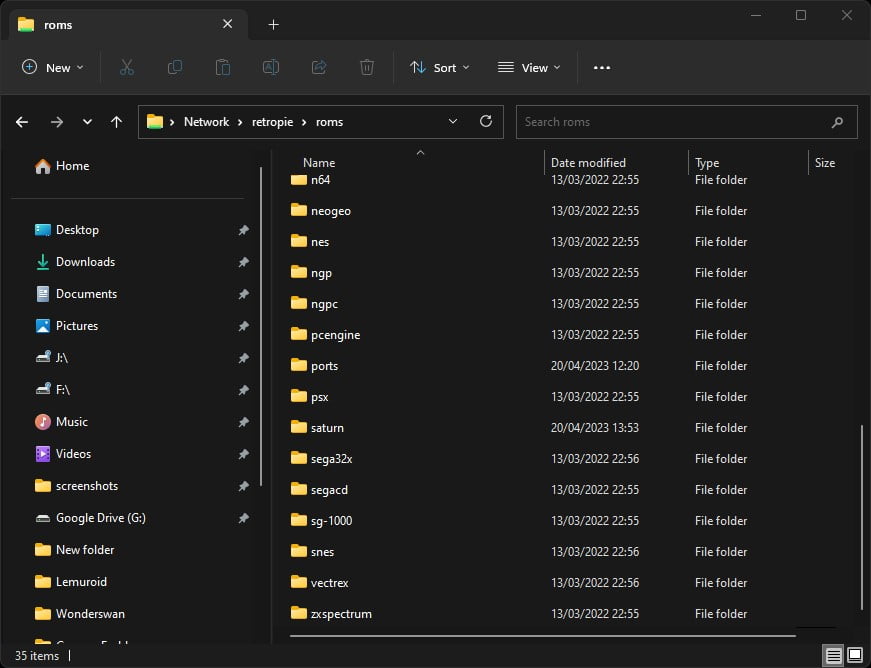
Once you have copied your games across to the roms folder, reboot your Raspberry Pi or EmulationStation so the games can be indexed and visible for you to select.
Step 3 – Select A Nintendo 64 Game & Play
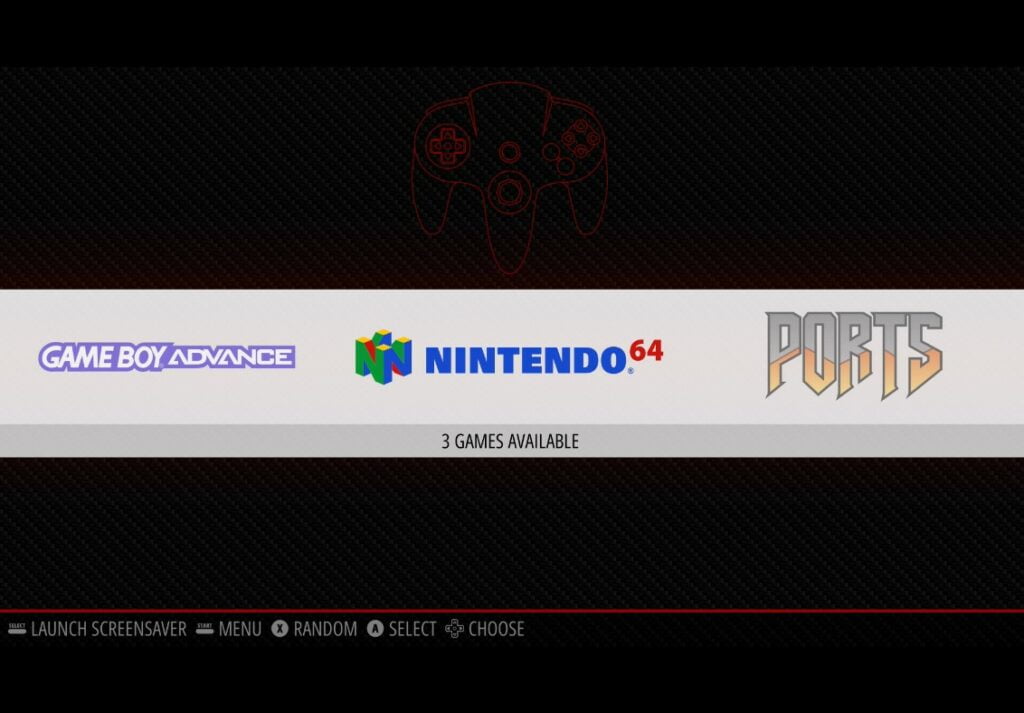
Once EmulationStation has restarted, you will be able to scroll across to the Nintendo 64 section which will also show how many games it has registered to play.
Simply select the Nintendo 64 menu, and pick a game to play!
This RetroPie Nintendo 64 page provides details on the state of Nintendo 64 emulation on the Raspberry Pi as well as further configuration details for RetroPie N64 emulation.

As a retro gaming & retro computing enthusiast, I enjoy sharing help guides and about retro gaming in general, when I have the spare time to do so!
