Requirements
Before we start, it is worth noting the following requirements before you follow the guide.
- Recommended PC requirements – Windows 7 (x64) and above, GPU that accommodates at least OpenGL 4.5 / Vulkan 1.1, 8GB RAM, Microsoft Visual C++ 2017 X64 Redistributable
- Some Wii U Games – You’ll at least one game to test out in this guide!
- A Controller – If you have a controller, ensure this is connected before launching CEMU. Whilst using the keyboard is possible, we recommend using a controller! The 8bitdo Pro 2 Bluetooth Controller is an excellent controller and can also be connected by USB.
1. Download CEMU & Install
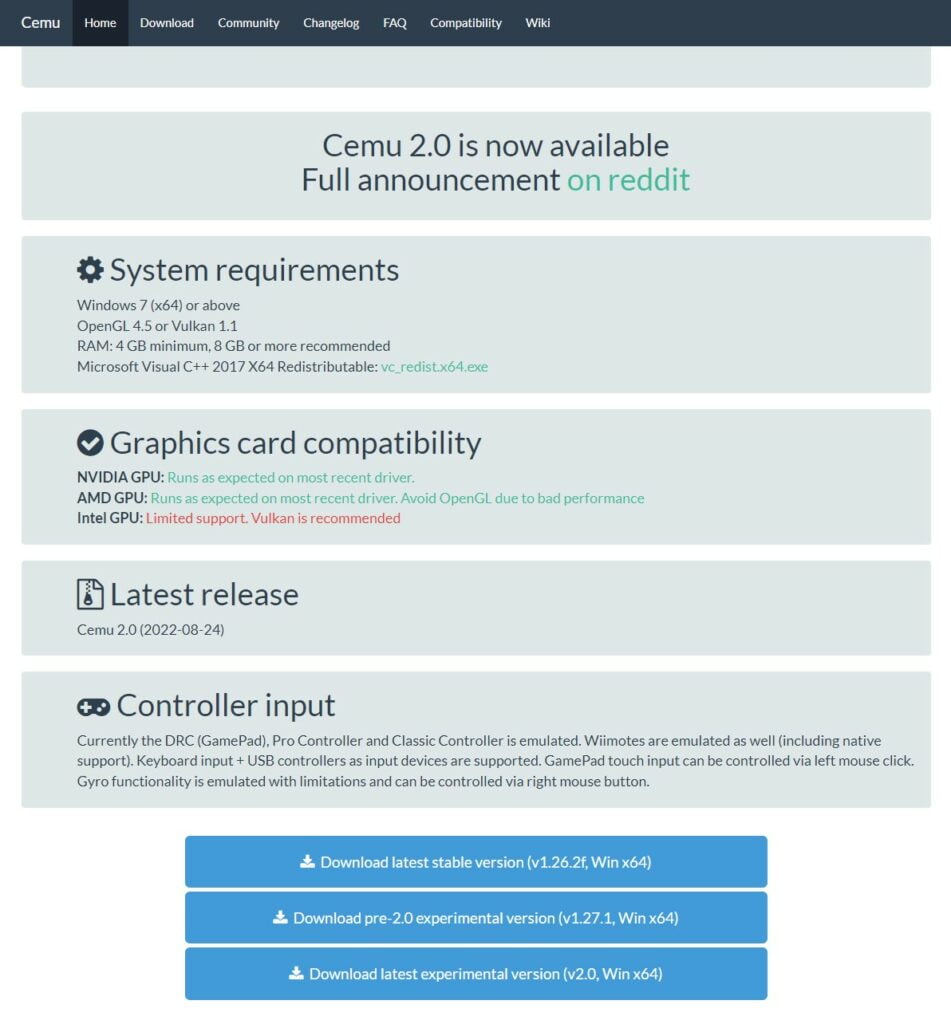
Download CEMU from https://cemu.info/
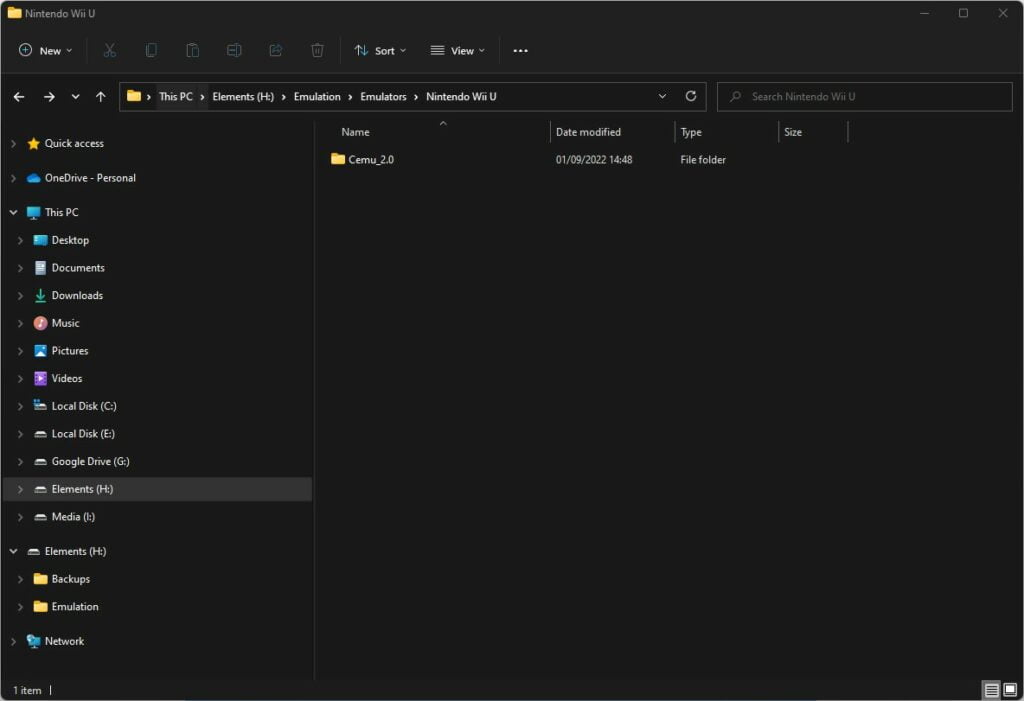
Extract the files from the downloaded file into their own folder. I have created a folder on my external drive for Nintendo Wii U emulators, but feel free to put it wherever suits you.
2. CEMU Set Up
Next, boot up CEMU. You will be presented with a getting started window which asks you to define paths to folders for the mlc path and game path. These are for the Wii U internal storage location and where CEMU should look for your game files.
Select these as required, then click on the ‘Download community graphic packs’ button, which will download patches for games to enhance them visually, unlock frame rates to 60FPS as well as cheat patches.
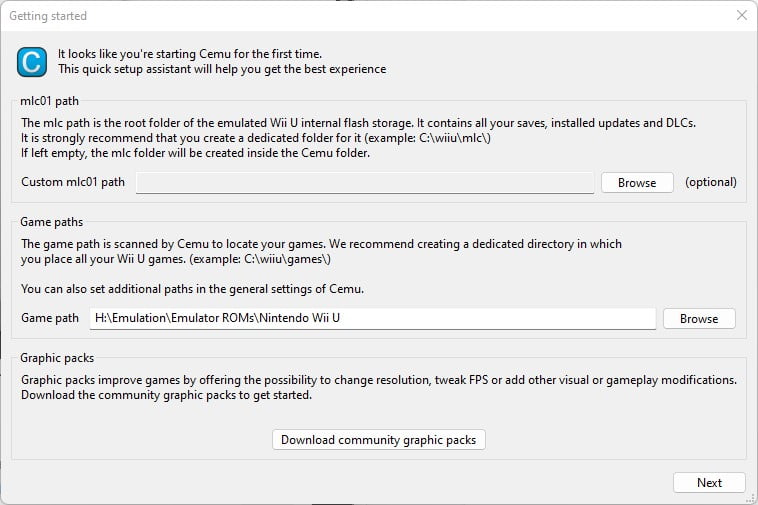
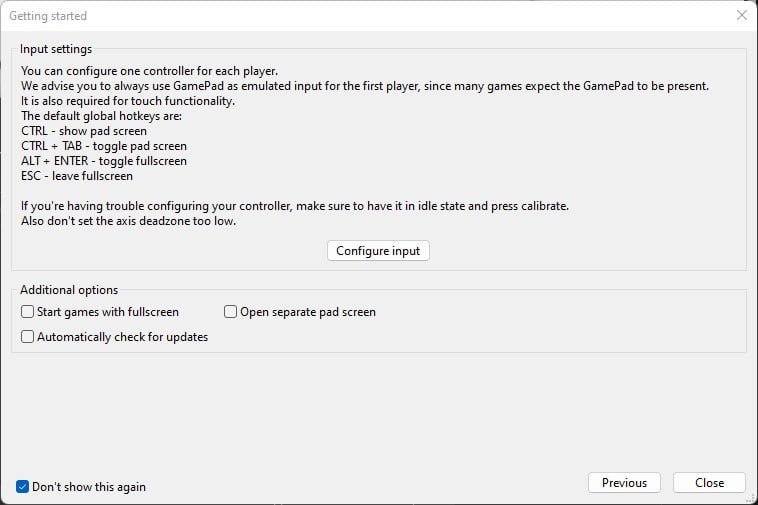
Click next and you will be taken to the next step which is to configure your input settings for your controller. You’ll need to make sure that you have your controller connected to your system for it to be recognised by CEMU.
Set up is relatively easy if you are using a controller that uses predefined systems such as XInput and DirectInput.
First of all, select Wii U Gamepad under the ‘Emulated controller’ section, this has to be controller 1, since the Wii U always treats the Wii U Gamepad as its main controller. Next, go to the controller section and click the + icon.
Next, under the API section, select the type of controller you are using, e.g. XInput for an Xbox controller or XInput compatible controller, then just select the controller number in the drop-down menu beneath.
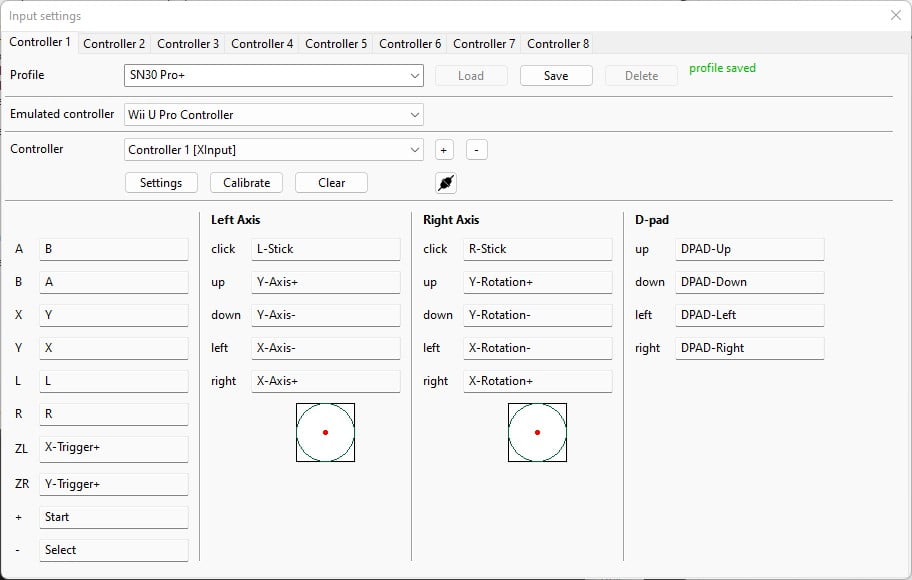
Once you’ve done this, the controls will be preconfigured for you based on what you have selected. If your controller is not automatically recognised, then you can manually assign each button on your controller by selecting each button one at a time, and then clicking the button on the controller you wish to assign.
Once you have everything assigned as desired, save your controller settings as s preset by typing in a preset name in the Profile text box, then clicking ‘Save’.
Next, close the input settings window and then the ‘Close’ button on the getting started window.
You will then be taken to the CEMU emulator games list which is where your games will appear if they have successfully been identified by CEMU.

3. CEMU Game Compatibility Patches & Fixes
If there are game compatibility issues, then fixes are sometimes available as patches that can be activated. For example, New Super Mario Bros.U has an issue where it can crash on the title screen, to fix this, simply go to the menu option ‘Options -> Graphic Packs’, then check if your game is listed as a workaround section with any fixes listed, if so, tick the box and it will resolve the issue.
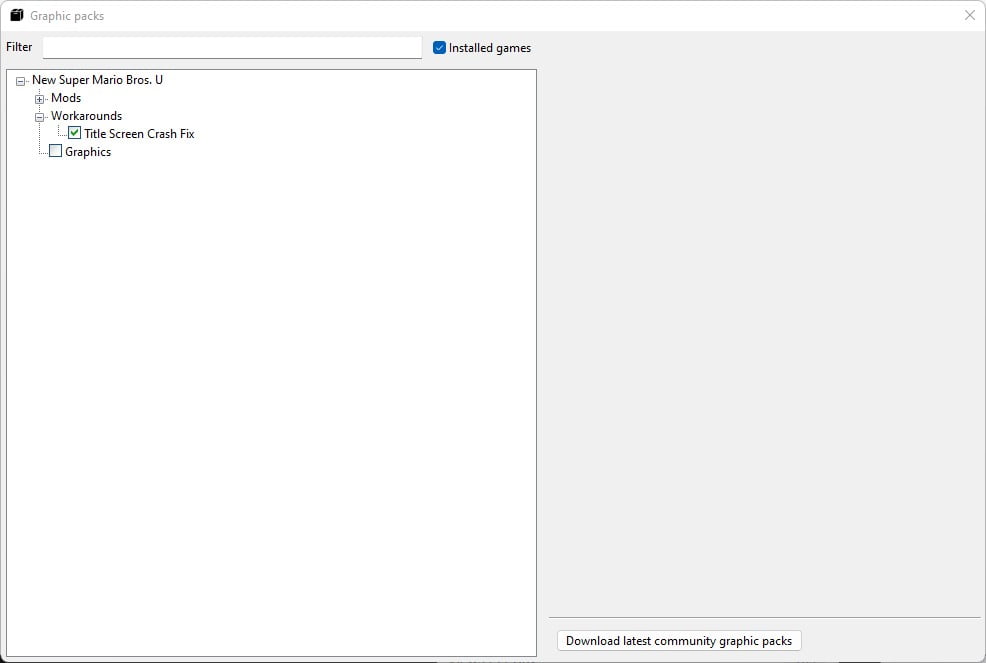
Wii U emulation is still relatively new, so compatibility is still very much a work in progress. CEMU delivers over 50% compatibility of games being either perfect or playable, so it’s at a good standard, but be prepared to have issues still with some games.
You can check the CEMU compatibility list for full details on all games and their compatibility status.
4. CEMU Graphics Settings
To make adjustments to CEMU graphics settings, go to ‘Options -> General settings’, then click on the ‘Graphics’ tab.
Here you can change the default settings for the Graphics API to use either OpenGL or Vulkan (Choose whichever works best with your setup) as well as other graphics settings such as VSync, the upscale and downscaling filter method used as well as the screen ratio settings.
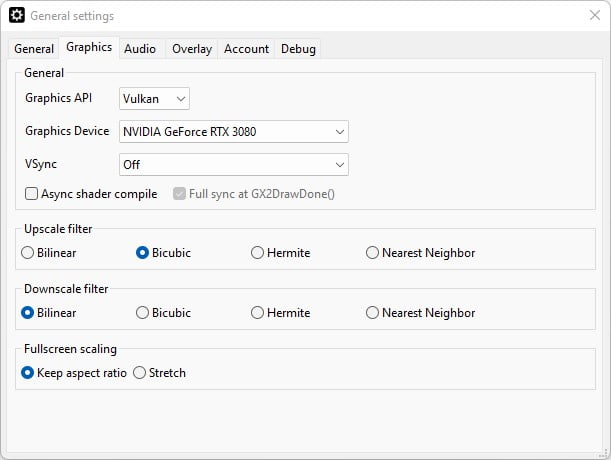
The default settings here are generally fine to use, but come back and make tweaks.
Cemu Shader Cache Files
Cemu generates shader cache files whilst you play, for a faster recall of shaders the next time the game requires them. You can download Cemu shader cache files to speed up the process of shader compilation, allowing you to experience Wii U games with minimal judder, which typically occur when shader files are being generated whilst playing games.
Check out our Cemu shader cache guide for more details on how to use these files.
5. CEMU Game-Specific Settings
If you wish to increase the resolution as well as specific graphics options for games, you can do this by going to the games list, right-clicking a game and selecting ‘Edit graphic packs’.
Expand the game you wish to adjust with the plus icon, then check the ‘Graphics’ tick box. You will also see to the right-hand side you can now update the TV resolution (which will be what resolution the game outputs to your screen) as well as some other settings that can be adjusted specifically to the game you have selected.

6. Install Game Updates & DLC
To install updates and DLC, simply go to the ‘File -> Install game title, update or DLC’ option in the menu, then navigate to the update or DLC folder where the files you wish to install, then select the folder. CEMU will then begin to install the updates / DLC as required.
7. Launch A Game And Enjoy
Simply double-click on a game on the game list to launch a game.
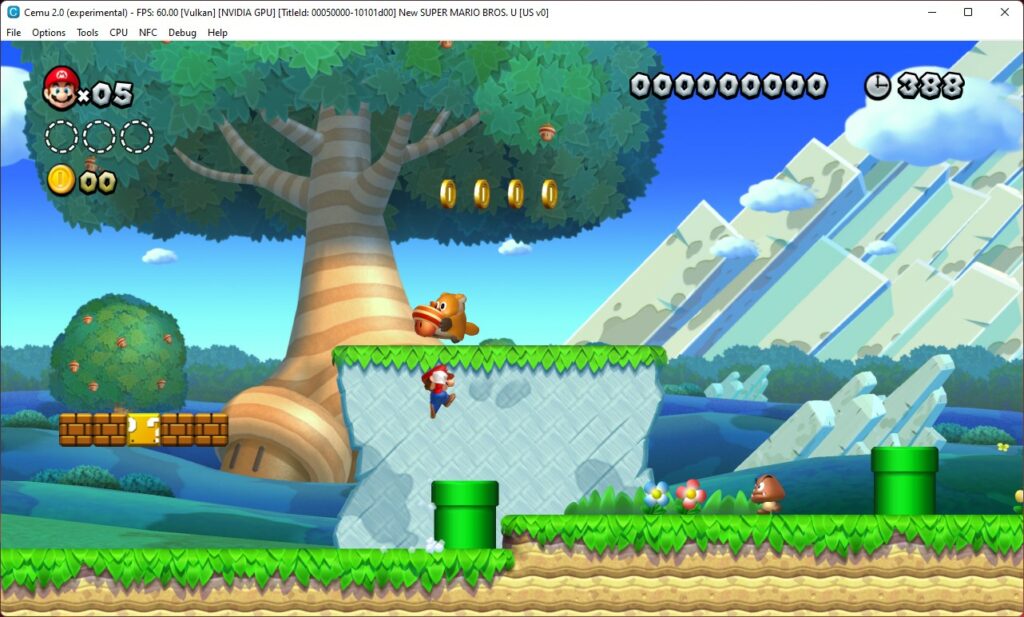
CEMU is an excellent Wii U emulator, but as mentioned earlier, its development is still very young and will improve in compatibility and performance as time goes on.
It is worth experimenting with, especially if you have a lower-end system as decent results still can be achieved as long as you test out reduced graphical settings and do not try to upscale things too high a resolution.

As a retro gaming & retro computing enthusiast, I enjoy sharing help guides and about retro gaming in general, when I have the spare time to do so!