Cemu utilises shader caches, these essentially are a collection of pre-compiled shaders which have been dumped to files which are then easily recalled by Cemu so it can render things quickly again on screen, saving the player from experiencing jumpy performance in gameplay.
If you do not have a set of pre-compiled shaders in place, then these are generated on the fly and generally affect game performance while you play.
So, you have two options: play through the game yourself and have these shader files compile as you play, or download the files where somebody else has done the work for you, leaving you to enjoy your game running super smooth and looking great! I prefer the latter option and in this guide, I show you how to set up Cemu shader cache files.
Be sure to also check out our more comprehensive Cemu setup guide for more details on how to get up and running with the best Wii U emulator around.
How To Install Cemu Shader Cache Files
Installing Cemu shader cache files is very simple, although there can be issues associated with getting the shader file you have downloaded aligned with the file name that Cemu is expecting for the game you are trying to play.
It is also worth noting that the latest versions of Cemu allow the use of Vulkan graphics and asynchronous shaders, so if you have a more recent GPU, you may have a better experience using this method instead of the shader cache approach, test out both and see what suits you best.
Where To Put Shader Cache Files In Cemu
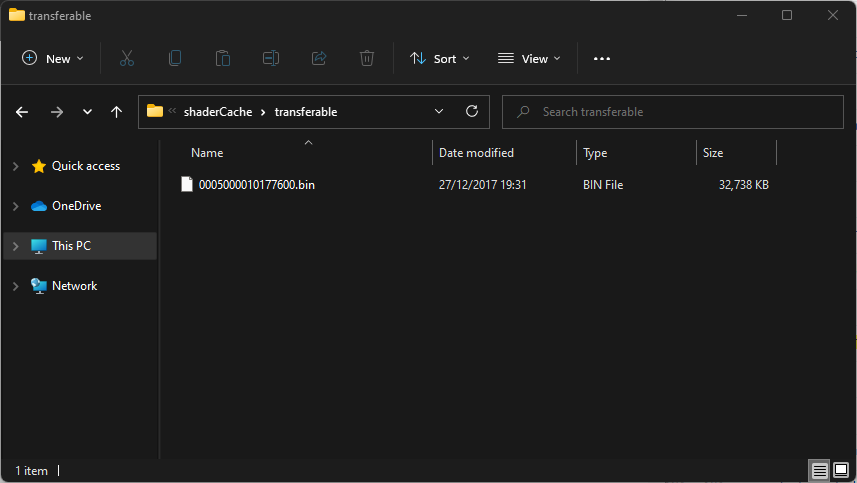
Take your downloaded .bin shader cache file and copy it to the below location found in your Cemu installation folder:-
‘/shaderCache/transferable/’

Then launch the game and you should see Cemu begin to compile cached shaders.
Cemu Shader Cache Not Loading?
If you find that Cemu seems to be disregarding the downloaded .bin shader cache file and is still creating its own new file, then follow the below steps to resolve this issue:-
- Delete all files from the ‘/shaderCache/transferable/’ folder.
- Launch the game you have downloaded a shader file and allow it to cache some shaders.
- Close the game and go back to the ‘/shaderCache/transferable/’ folder.
- You will now see a .bin file that Cemu has created for the game launched.
- Make a note of this file name, delete it, and then rename the downloaded .bin shader file to the one Cemu created.
- Copy this renamed file to the ‘/shaderCache/transferable’ folder.
- Relaunch the game. Cemu should now use your downloaded but renamed .bin file as the shader cache. Make sure you do not allow to generate a new cache if prompted to do so.

As a retro gaming & retro computing enthusiast, I enjoy sharing help guides and about retro gaming in general, when I have the spare time to do so!