The Sega Dreamcast is still hugely popular today and the fantastic RetroArch allows Dreamcast emulation, and those who wish to relive their Dreamcast memories, do so very easily.
This guide shows you how to set up RetroArch for Sega Dreamcast.
Requirements
- Install RetroArch – Download RetroArch Here
- Have at least one Dreamcast game disc image ready to test – These are typically .bin, .gdi or .cdi files
- Dreamcast BIOS file – This is explained in more detail here, you do not actually need a copy of the original Dreamcast BIOS, but will help in terms of better compatibility with more games.
- To play games, you will ideally need a controller – You can mess around using keyboard controls, but make life easier by using a decent controller. The 8bitdo Pro 2 Bluetooth Controller is an excellent all-round controller and can also be connected by USB for even better performance in terms of latency.
Step 1 – Download Dreamcast BIOS File
Now, this first step is not actually a requirement for Dreamcast emulation, so if you are having trouble locating the file or just want to press on without it, then skip straight to the next step in this guide.
If you are seeking the Dreamcast BIOS file, then you need to search online for a file called ‘dc_boot.bin’, This is not usually difficult to find with an online search.
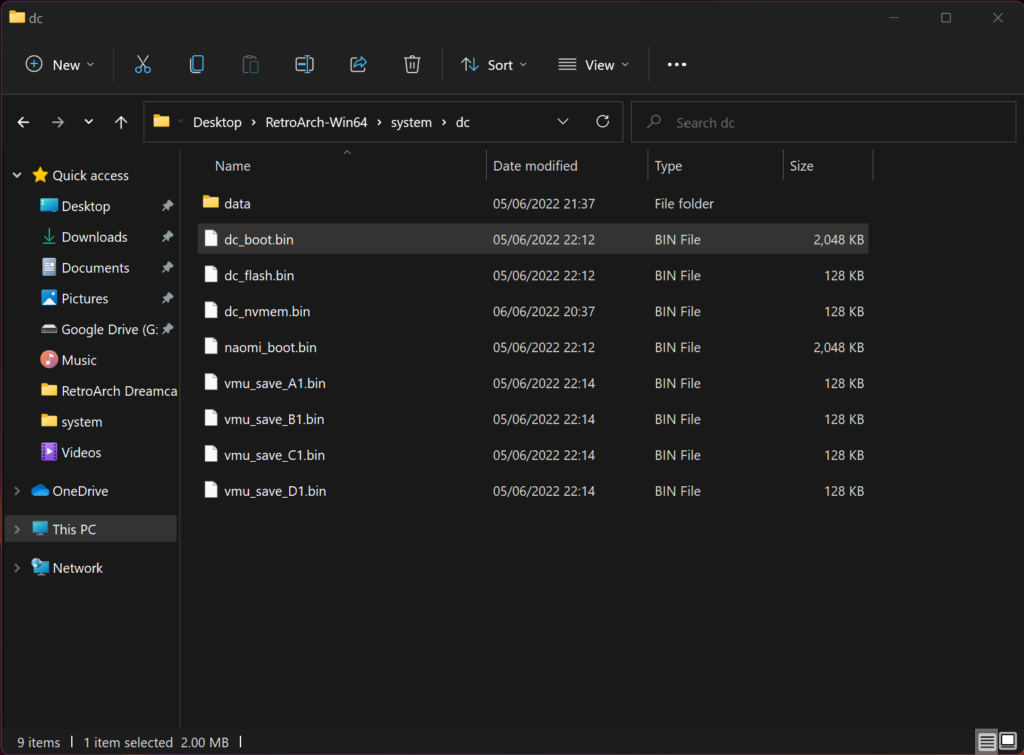
Once you have downloaded this file, you will need to place it in a folder called ‘dc’ which has to be created in the retroarch ‘system’ folder, for example:-
retroarch/system/dc/dc_boot.bin

Step 2 – Download The Sega Dreamcast ‘Flycast’ Core In RetroArch
Next, boot up RetroArch.
(Note that your version of RetroArch may appear different to the following images, purely because of the theme it is using. Do not worry about this, the process we are going through here is the same regardless of theme.)
Once RetroArch is open, select ‘Load Core’, then select ‘Download a Core’.
Then scroll down the Core Downloader menu until you reach ‘Sega – Dreamcast/Naomi (Flycast)’. Select this, then the core will begin to install.

If you are using an existing installation of RetroArch, be sure to also go back to the main menu, scroll down to ‘Online Updater’ then select ‘Update Core Info Files’ and ‘Update Databases’.
This will update all key files and databases in RetroArch making sure everything is all up to date and minimising any potential issues.
Step 3 – Select A Dreamcast Game To Play
We are now ready to play Dreamcast games!
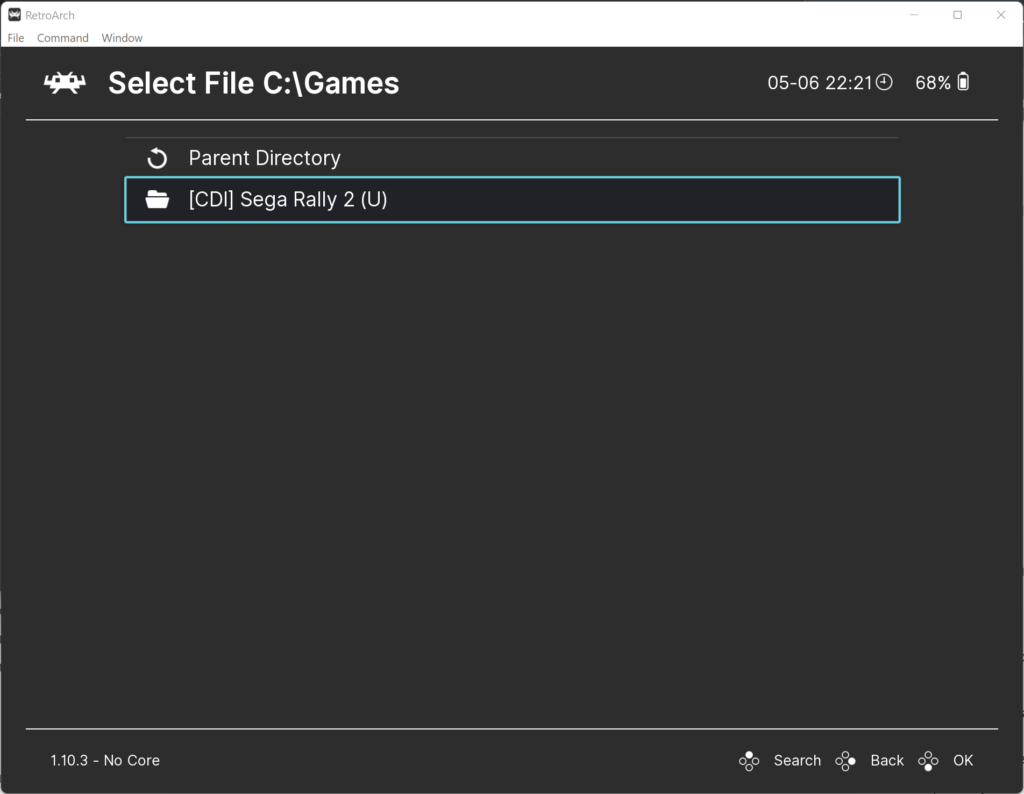
Go back to the main menu in RetroArch then select ‘Load Content’,
Next, navigate to where you have your Dreamcast games stored, then select the game disc image you want to play.

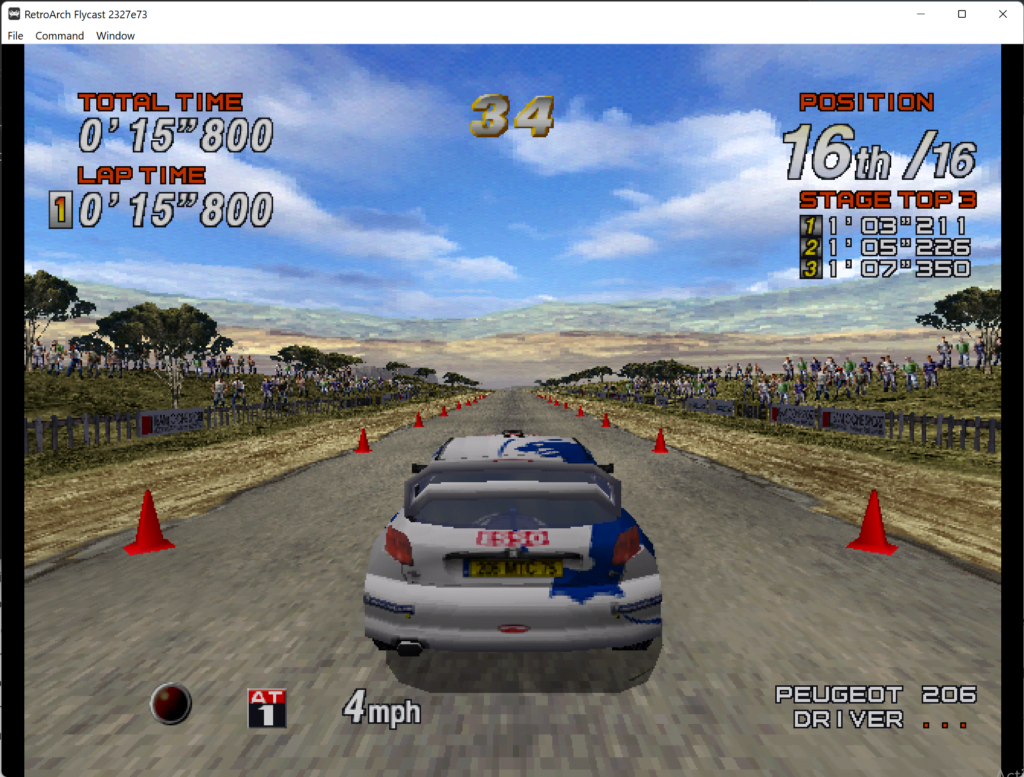
Your game should now boot in RetroArch using the Flycast core.

Now you can experience all the Dreamcast classics and make you wish Sega was back making hardware again!
RetroArch Dreamcast FAQs
Where Do I Put The Dreamcast BIOS In RetroArch?
You place the Dreamcast BIOS file in the Retroarch ‘system’ folder. Be sure to also create another folder within the system folder called ‘dc’. See the below example:-
‘retroarch/system/dc/dc_boot.bin‘
Does RetroArch Support Dreamcast?
Indeed it does and this guide will take you through a few short steps how to set up RetroArch for Sega Dreamcast.
Do You Need A BIOS For Sega Dreamcast In RetroArch?
No, Flycast has its own built-in BIOS which can run games perfectly ok. Although you may wish to use an actual Dreamcast BIOS file with Flycast to enhance compatibility further as well as get a more authentic experience with the Dreamcast boot menu.
What Is Flycast?
Flycast is a multi-platform Dreamcast emulator which also has a libretro core for use with RetroArch.
Flycast not only emulates the Dreamcast but also NAOMI and Atomiswave arcade system boards.

As a retro gaming & retro computing enthusiast, I enjoy sharing help guides and about retro gaming in general, when I have the spare time to do so!