Craving some nostalgia with your beloved SNES games on a massive screen? RetroPie has got you covered, transforming your dream Super Nintendo collection into a neat bundle, alongside a treasure trove of other vintage systems.
A comprehensive solution for Raspberry Pi, RetroPie fuses the prowess of EmulationStation—a visually captivating and polished interface—with the time-honored RetroArch, the eminent overlord of the emulation realm, providing a plethora of emulator cores and cutting-edge emulation tools.
Follow this RetroPie SNES setup guide, and you’ll swiftly have your SNES games primed on your Raspberry Pi and ready for action.
Requirements
- A Raspberry Pi
- Download and Install RetroPie – Download RetroPie Here
- A keyboard and mouse – If you plan on using your Raspberry Pi to download BIOS files and ROMs
- Have at least one SNES game ROM ready to test – The lr-snes9x core accepts the following file extensions – .7z .bin .fig .mgd .sfc .smc .swc and .zip
- To play games on RetroPie you will of course need a controller – The 8bitdo SN30 Pro Controller is one of the best RetroPie controllers and an excellent all-arounder for emulation and can also be connected by USB for even better performance in terms of latency, plus it has a cool SNES inspired form factor!
Step 1 – Boot Your Raspberry Pi
The SNES emulator ‘lr-snes9x’ typically comes preinstalled as part of the prebuilt RetroPie setup, so you should not have to install it manually.
Should you find that for some reason the lr-snes9x emulator is not installed, then follow the below steps:
- Go to the RetroPie options menu and select ‘RetroPie Setup’
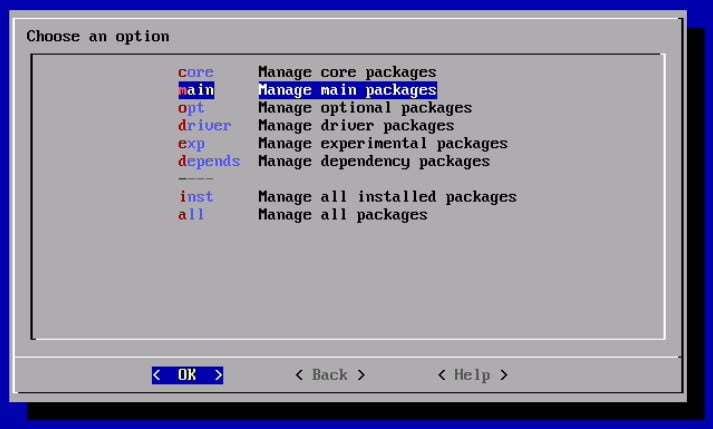
- ‘Manage packages
- ‘Manage main packages’
- Scroll down and select ‘lr-snes9x2010’
- Finally, select ‘Install from pre-compiled’ binary’
- RetroPie will then download and install the SNES emulator
- Navigate back through the menu and then select ‘Exit’
Step 2 – Copy SNES ROMs To ‘roms’ Folder
Now you will need to copy at least one of your SNES game ROMs to the RetroPie ‘roms’ folder.
RetroPie with lr-snes9x will be able to boot games stored in .zip files as well, so you can either place the game files directly into this folder, or within a .zip file.
Using Your Raspberry Pi To Move ROM Files
To get desktop mode up and running on your Raspberry Pi RetroPie setup, it’s important to have the ‘Pixel’ desktop environment installed. Don’t worry, it’s a breeze!
Just head over to the RetroPie options menu and choose ‘RetroPie Setup’.
- RetroPie Setup (Access this from the RetroPie options menu)
- Configuration / Tools
- Raspbian Tools
- Install Pixel desktop environment
After installing the Pixel desktop environment, restart your Raspberry Pi. In RetroPie, simply navigate to ‘Ports’ and pick ‘Desktop’.
This will then launch into desktop mode, allowing you to explore your Raspberry Pi’s folders and files.
Next, you will need to transfer your SNES ROMs to the below location:
/home/pi/RetroPie/roms/snes
Remotely Accessing Your Pi From A Windows PC
For those using a Windows PC, transferring files to your Raspberry Pi is super easy.
First, verify that your Raspberry Pi and PC are connected to the same network. Next, open the Windows file explorer and enter ‘\\retropie’ in the address bar.
Give your Pi a minute or two to become visible on the network, as it might require some time to appear.
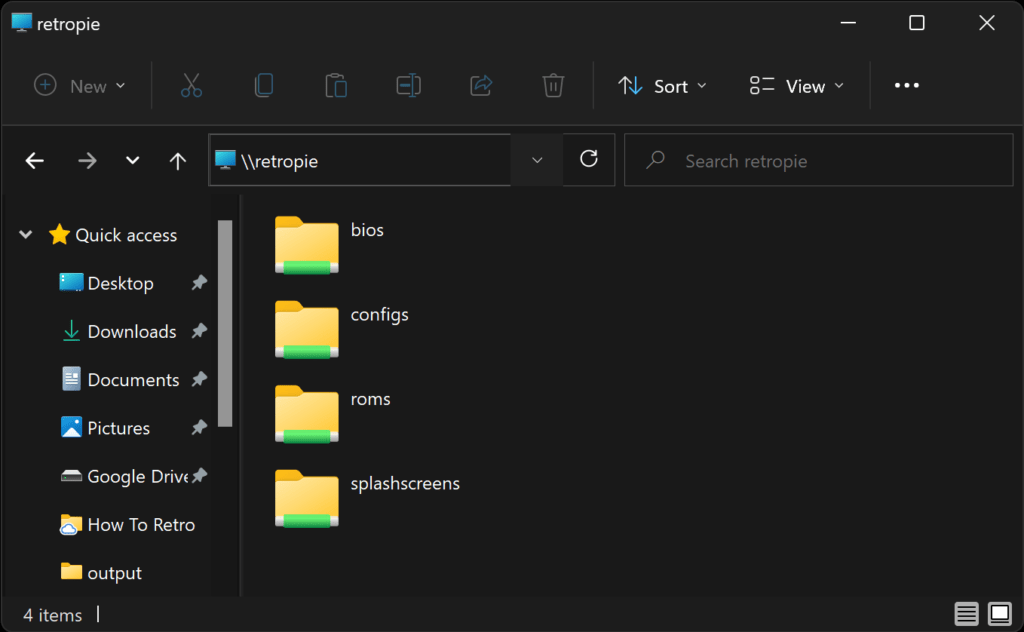
This will then connect to your Raspberry Pi and you will be able to see the ‘roms‘ folder.
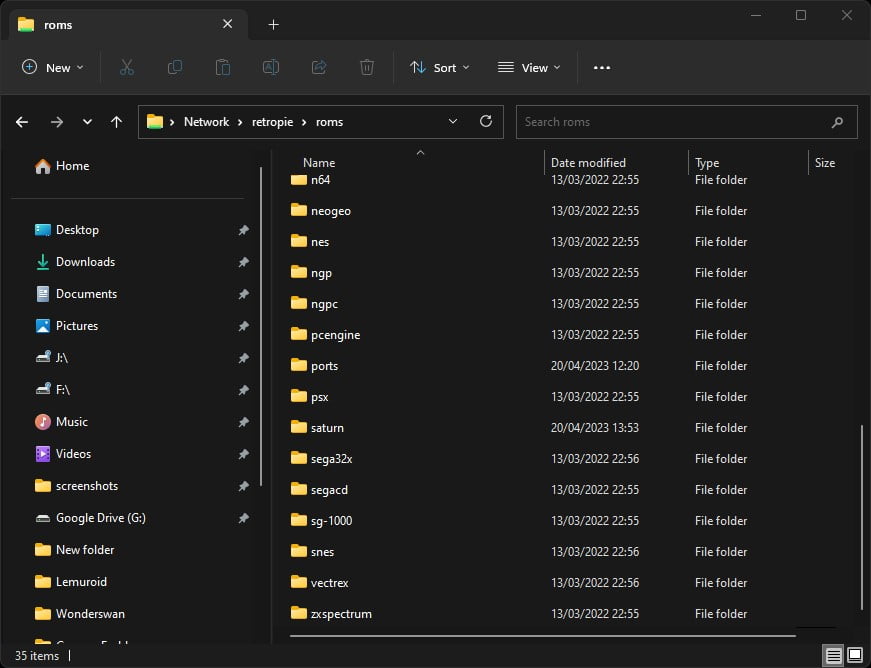
Next, copy your game files from your PC to the /roms/snes/ folder on your Raspberry Pi.
Once you have copied your games across to the roms folder, restart your Raspberry Pi or EmulationStation so the games can be indexed and visible for you to select.
Step 3 – Select A SNES Game & Play
After EmulationStation reboots, navigate to the Super Nintendo section, which will display the number of available games, next, select the Super Nintendo menu and choose a game to enjoy!
This RetroPie Super Nintendo page provides details on the state of SNES emulation on the Raspberry Pi as well as further configuration details for RetroPie SNES emulation.


A lifelong avid gamer and computing enthusiast, Matt has decades of Retro Gaming experience. Now over 40 years old, Matt now even considers himself retro, but fortunately, nobody has developed a Matt emulator (not yet at least!).
