Are you a PS1 fan and want to relive the golden age of the PlayStation? Look no further! In this RetroPie PS1 setup guide, we take you through the steps of setting up RetroPie to bring back those cherished gaming memories.
Requirements
- A Raspberry Pi
- Download and Install RetroPie – Download RetroPie Here
- A keyboard and mouse – If you plan on using your Raspberry Pi to download BIOS files and ROMs
- PS1 BIOS Files – The lr-pcsx rearmed emulator core has a built-in BIOS that is fine for a number of games, but to ensure full compatibility, you might want to consider sourcing original PlayStation BIOS files. The recognised BIOS files are as follows:-
- psxonpsp660.bin
- scph101.bin
- scph7001.bin
- scph5501.bin
- scph1001.bin
- Have at least one PS1 game ready to test – The lr-pcsx-rearmed core accepts the following file extensions – .cue .ccd .chd .exe .iso .m3u .pbp .toc
- To play games on RetroPie you will of course need a controller – The 8bitdo Pro 2 Bluetooth Controller is one of the best RetroPie controllers and an excellent all-arounder for emulation and can also be connected by USB for even better performance in terms of latency
Step 1 – Boot Your Raspberry Pi
The PS1 emulator core ‘lr-pcsx-rearmed’ comes preinstalled as part of the prebuilt RetroPie setup, so you should not have to install it manually and can skip straight to Step 2.
Should you find that for some reason the PS1 emulator is not installed, then follow the below steps:
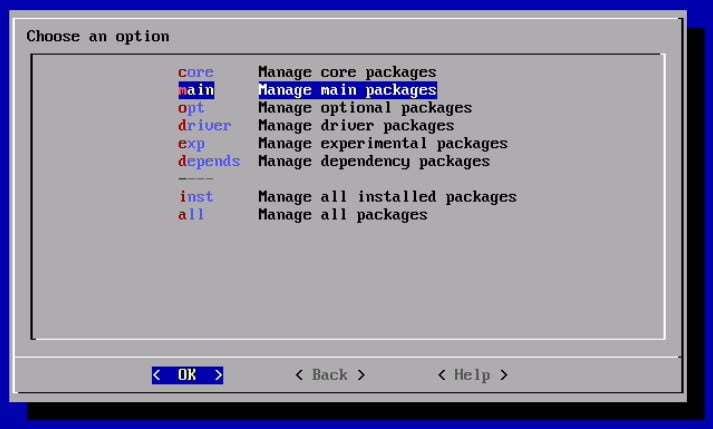
- Go to the RetroPie options menu and select ‘RetroPie Setup’
- ‘Manage packages
- ‘Manage main packages’
- Scroll down and select ‘lr-pcsx-rearmed’
- Finally, select ‘Install from pre-compiled’ binary’
- RetroPie will then download and install the PS1 emulator
- Navigate back through the menu and then select ‘Exit’
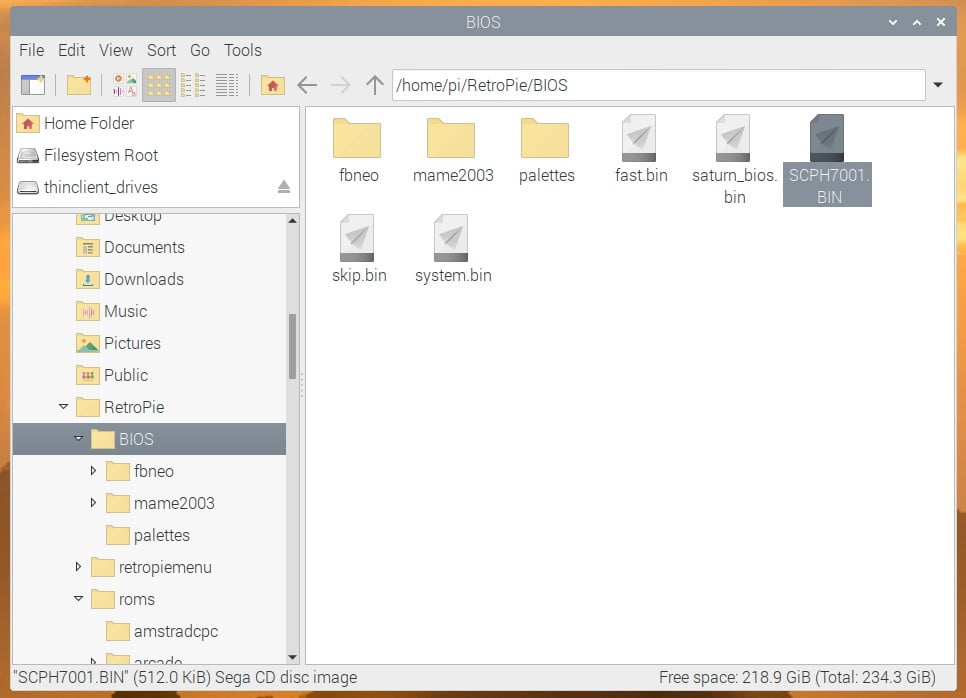
Step 2 – Copy PS1 BIOS File To ‘bios’ Folder
You will now need to copy your PS1 BIOS file to the RetroPie BIOS folder.
There are several ways to do this, but the easiest choices are to either use your Raspberry Pi to download the BIOS file and copy it to the BIOS folder location, or remotely access your Pi from a PC.
Using Your Raspberry Pi To Download BIOS File
In order to access desktop mode on your Raspberry Pi RetroPie installation, you will need to make sure you have the ‘Pixel’ desktop environment’ installed. This is easy to do.
Simply access the RetroPie options screen and select ‘RetroPie Setup’.
- RetroPie Setup (Access this from the RetroPie options menu)
- Configuration / Tools
- Raspbian Tools
- Install Pixel desktop environment
Once the Pixel desktop environment has been installed, reboot your Raspberry Pi and then you can access desktop mode by scrolling in RetroPie to ‘Ports’ and then selecting ‘Desktop’.
This will then launch desktop mode where you can access your Raspberry Pi’s directories and files like a normal PC.
You will then need to copy your PlayStation BIOS file to the below location, ensuring it follows the naming convention detailed in the requirements section of this guide.
/home/pi/RetroPie/BIOS
Remotely Accessing Your Pi From A Windows PC
If you have a Windows PC, then this is the easiest way to get files across to your Raspberry Pi.
First of all, ensure that your Raspberry Pi is connected to the same network as your PC, then open up Windows file explorer and type ‘\\retropie‘ in the address bar.
Ensure that your Pi has been switched on for a minute or two as it sometimes takes a little time to appear on the network.
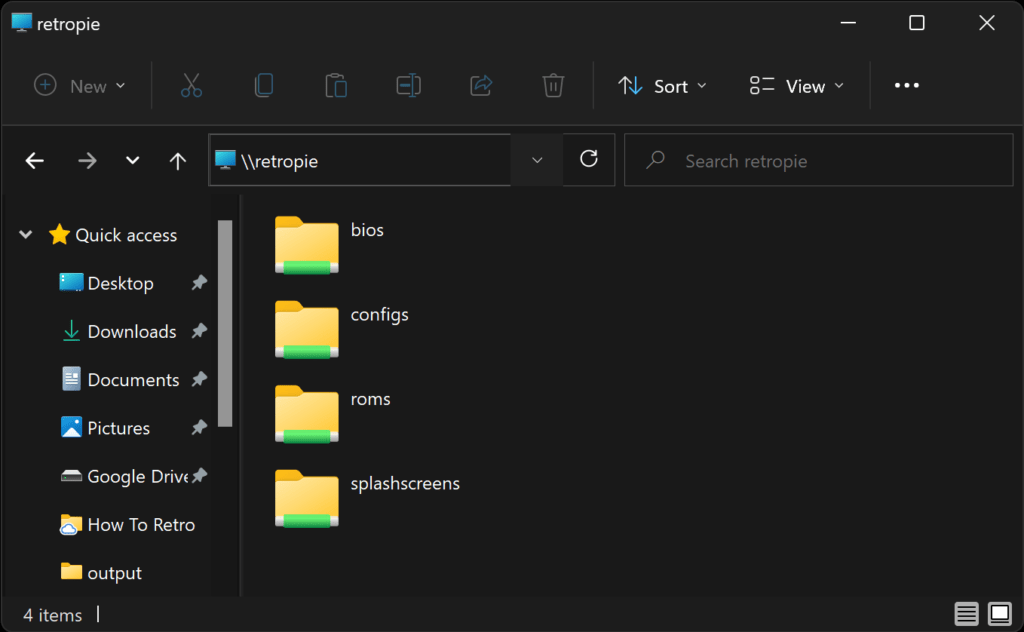
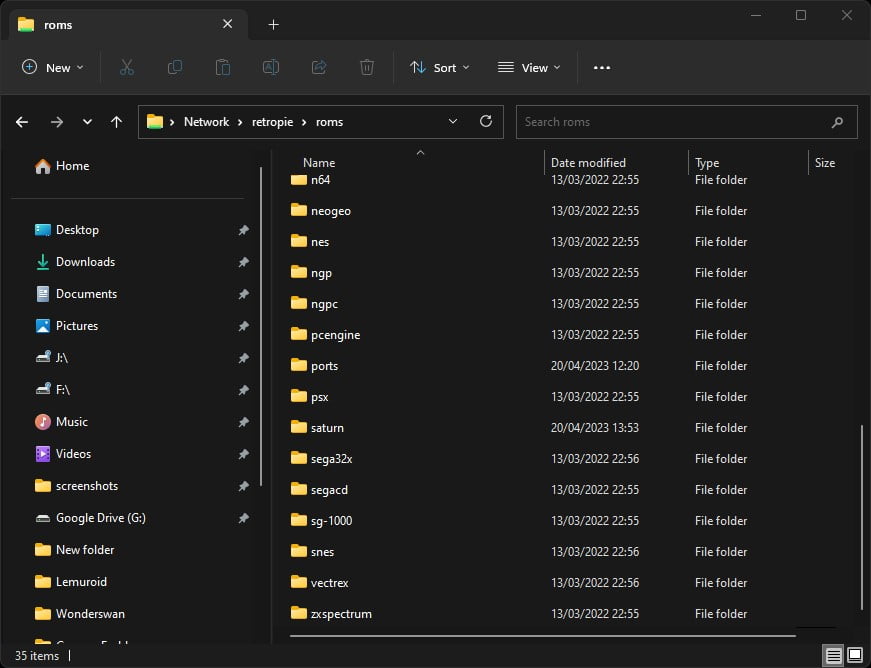
This should then connect to your Raspberry Pi and you will be able to see the ‘bios‘ and ‘roms‘ folders amongst others.
Simply then copy your files from your PC to these folders on your Raspberry Pi.
Step 3 – Copy PS1 Games To ‘roms’ Folder
Now you will need to copy at least one PS1 game to the RetroPie ‘roms’ folder.
Following the same method you chose in the previous step, copy your PS1 game files into the /retropie/roms/psx/ folder.
RetroPie will be able to boot games stored in .zip files as well, so you can either place the game files directly into this folder, or within a .zip file.
Note that PS1 games with RetroPie and the lr-pcsx-reloaded emulator require .cue file in order for them to work correctly. A .cue file is essentially a playlist that indexes the data and audio for the PlayStation disc so the emulator can load them correctly.
If your PS1 game files are just .bin and do not have a .cue file, then the RetroPie documentation provides links to help create .cue files.
Once you have copied your games across to the roms folder, reboot your Raspberry Pi or EmulationStation so the games can be indexed and visible for you to select.
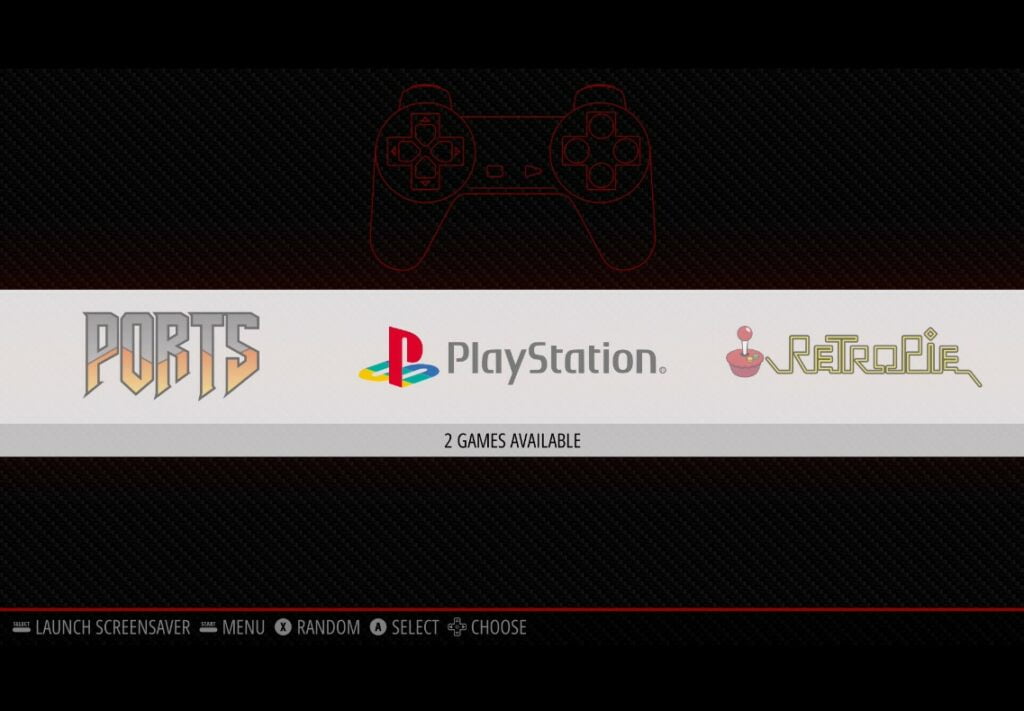
Step 4 – Select A PlayStation Game & Play
Once EmulationStation has restarted, you will be able to scroll across to the PlayStation section which will also show how many games it has registered to play.
Simply select the PlayStation menu, and pick a game to play!
This RetroPie PlayStation 1 page provides details on the state of PlayStation 1 emulation on the Raspberry Pi as well as further configuration details for RetroPie PlayStation 1 emulation.

A lifelong avid gamer and computing enthusiast, Matt has decades of Retro Gaming experience. Now over 40 years old, Matt now even considers himself retro, but fortunately, nobody has developed a Matt emulator (not yet at least!).
