The Sega Saturn is another system that has not been that accessible or particularly a great performer traditionally with emulation.
RetroArch and the Beetle Saturn Core however do a fantastic job of delivering as close as possible an experience to the original system.
Here’s a quick guide on how to set up RetroArch for Sega Saturn.
Requirements
First of all, here’s what you’ll need before we begin:
- Install RetroArch – Download from https://www.retroarch.com/
- Have at least one Sega Saturn game image in a folder to test
- Have the relevant Sega Saturn BIOS files depending on what region games you wish to play. This will be explained next in the guide
- To play games, you will need a controller. Why not check out a Sega-inspired controller below, for a more authentic Sega Saturn gaming experience?
Step 1 – Download Sega Saturn BIOS Files
Since Sega Saturn emulation requires the console BIOS file in order to boot up games, you are going to need to get hold of these. There are two main BIOS files, these are detailed on the RetroArch documentation page for the Beetle Saturn core (which we will be using):-
https://docs.libretro.com/library/beetle_saturn/
You will need to search for these files online and download the two files to play all region games, these are named specifically:-
sega_101.bin – For Japanese games
Mpr-17933.bin – For US & European games
Once you have these downloaded, open up your RetroArch application folder and go to the ‘System’ folder, you then need to copy or move both of these .bin files to the ‘System’ folder.
Step 2 – Download Sega Saturn ‘Beetle’ Core
The first step is to boot up RetroArch.
We now need to download a Sega Saturn emulator core. So, go to ‘Load Core’, then ‘Download a core’.
There are currently a few options in RetroArch for the Sega Saturn, we’re choosing Beetle Saturn as it is the more reliable and most up-to-date core currently.

Once you’ve downloaded the core, go back to the main menu and scroll down to ‘Online Updater’.
Here we are going to select ‘Update Core Info Files’ and ‘Update Databases’ to ensure everything is as up-to-date as possible relating to the emulator core.
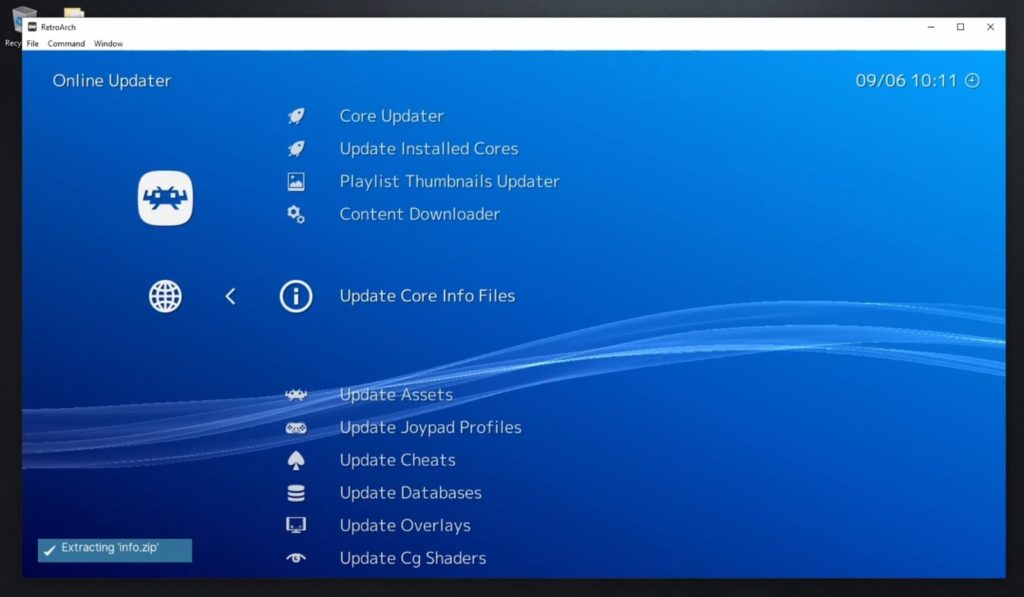
Next, quit and restart RetroArch
Step 3 – Scan For Sega Saturn Games & Create A Playlist
We now want to get RetroArch to scan for your Sega Saturn games.
On the main menu in RetroArch, select ‘Show Desktop Menu’ this will display the RetroArch desktop window where it is easier to access some more of the set-up options.
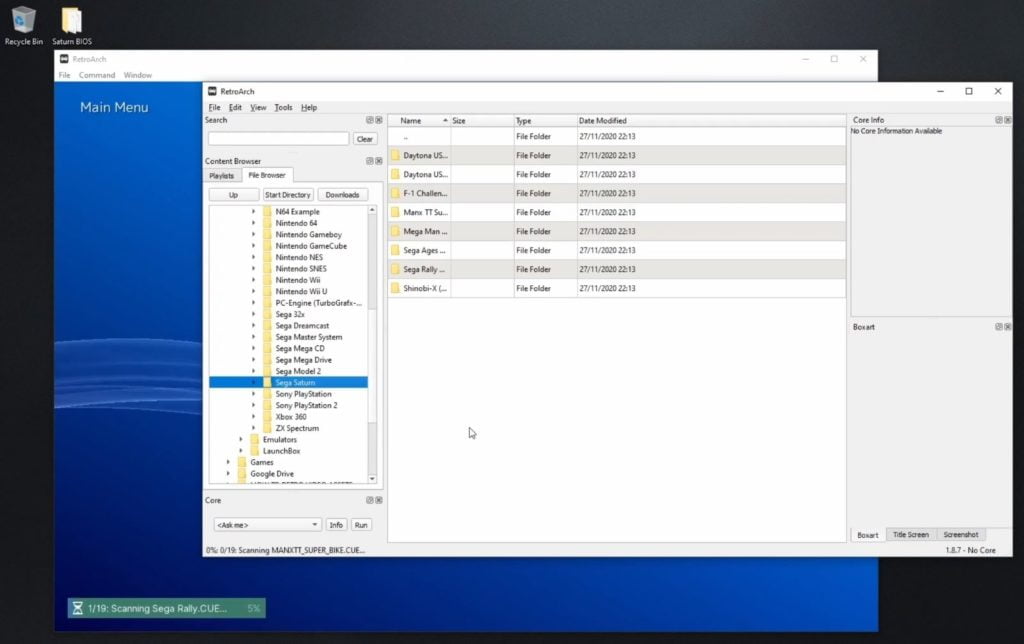
Next, locate your Sega Saturn games via the File Browser tab and then right-click and select ‘Scan Directory’.
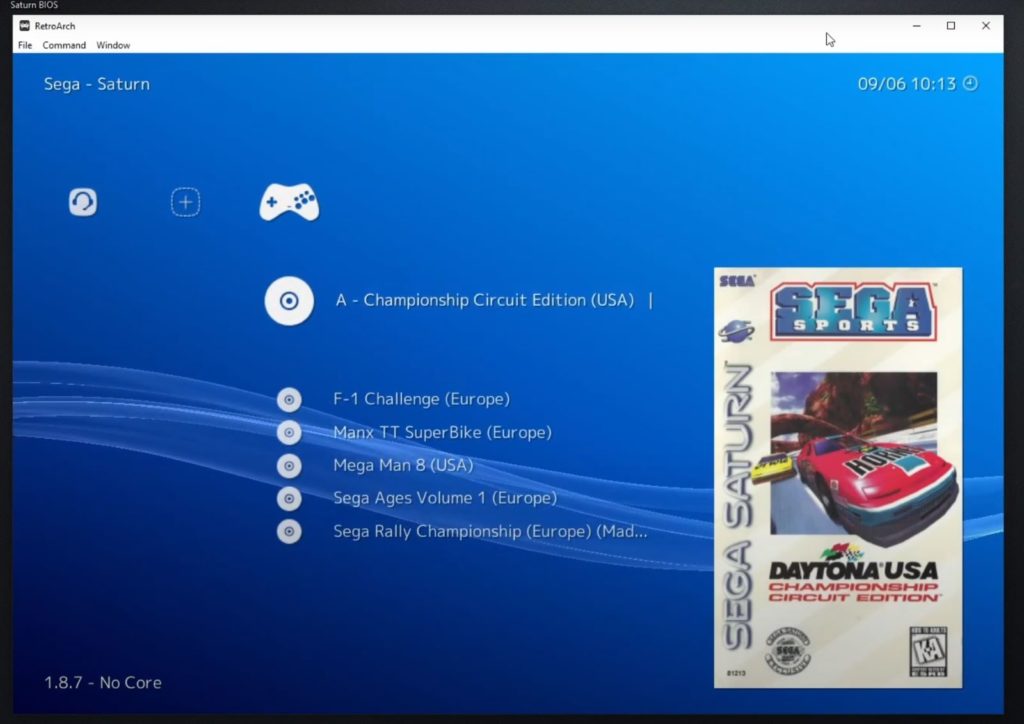
Go back to the Playlists tab and you will now see a Sega Saturn playlist has been created along with any games in your folder. For example, my Sega Saturn games folder contains some of the Best Sega Saturn Racing Games.
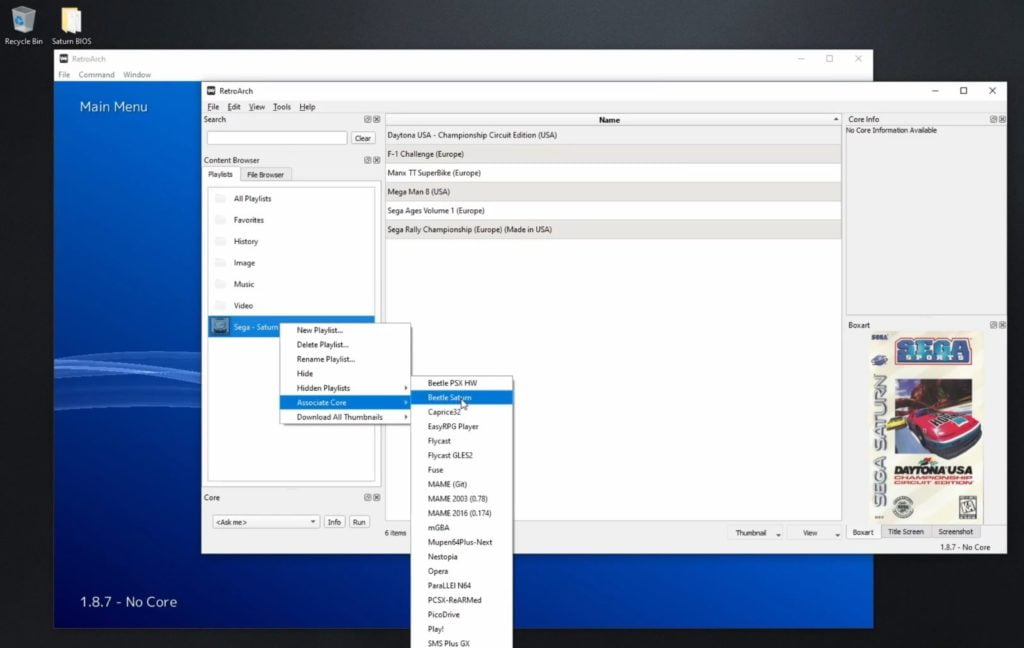
Step 4 – Set Default Sega Saturn Emulator
We now want to let RetroArch know which emulator core to use when playing Sega Saturn games by default, so right-click on the Saturn playlist, go to ‘Associate Core’ then select Beetle Saturn.
Step 5 – Download Box Art Thumbnails
If you want to download thumbnails including the box art which is visible in the RetroArch frontend you select games, simply go to the Sega Saturn playlist that has been created, right-click and select ‘Download all thumbnails’ then ‘This Playlist’.
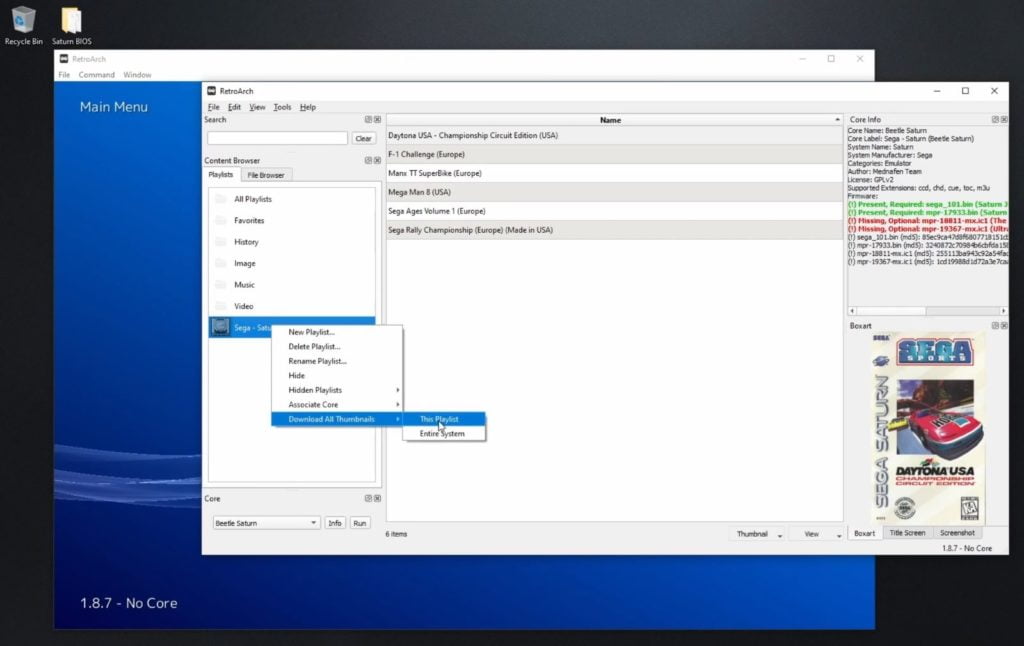
It is advisable here if you have a lot of games imported, then it can take some time to download all of the thumbnails, so you may decide to do this later.
We’re now ready to test a game.
Step 6 – Choose A Game To Play
Close down the desktop menu and go back to the RetroArch frontend. Scroll across to the right and you will see the Sega Saturn playlist that has been created along with your games.
To launch a game, select the game and press ‘Run’ to start. You’ll now see the Sega Saturn boot screen which should be followed by the game launching.
Step 7 – Upscaling Resolution & Additional Options
It is also worth noting a couple of useful features of the core and RetroArch.
If you press F1, you will get the RetroArch menu to appear, here you will find features such as save states, control configurations, video shaders, and other options so you can configure how RetroArch outputs your Sega Saturn emulation.
We’ll just need to quit RetroArch and reload for any changes you make to take effect. Now when you reload your game, you’ll see the difference in the visuals based on your selection.

And that’s all you need to get up and running playing your favourite Saturn games. There are plenty of other things that you can do with RetroArch and indeed with the Sega Saturn core.
Sega Saturn RetroArch Set Up – Video Guide

A lifelong avid gamer and computing enthusiast, Matt has decades of Retro Gaming experience. Now over 40 years old, Matt now even considers himself retro, but fortunately, nobody has developed a Matt emulator (not yet at least!).