The Nintendo 64 has always been a tricky system to emulate, but thanks to RetroArch and the ongoing improvements with emulators, N64 emulation is more accessible than it’s ever been.
Using one of the best N64 emulators, Mupen64Plus, RetroArch plays N64 games wonderfully and is also super easy to set up.
First of all, here’s what you’ll need before we begin:
Requirements
- RetroArch Installed – Download from https://www.retroarch.com/
- Some N64 ROMs in a folder (These can be either the game ROMs or an archive file which are holding the game ROMs)
- To play the games, you’ll need a controller, I’m using an Xbox One Bluetooth Controller. For this guide, I will assume you also have a controller ready to use. If not, I recommend the 8BitDo Pro 2 controller below:
Step 1 – Download N64 Core
The first step is to boot up RetroArch.
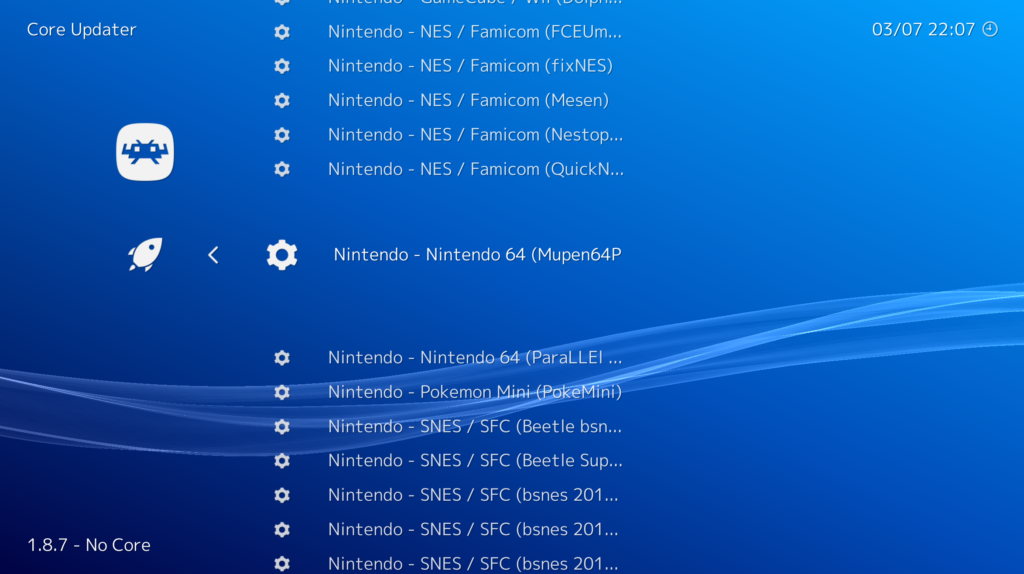
We then need to download an N64 emulator core. So, go to ‘Load Core’, then ‘Download a core’. There are currently two options in RetroArch for the N64, Parallel 64 and Mupen64Plus, we’re choosing Mupen64Plus as it has a reputation for having good all-round compatibility.
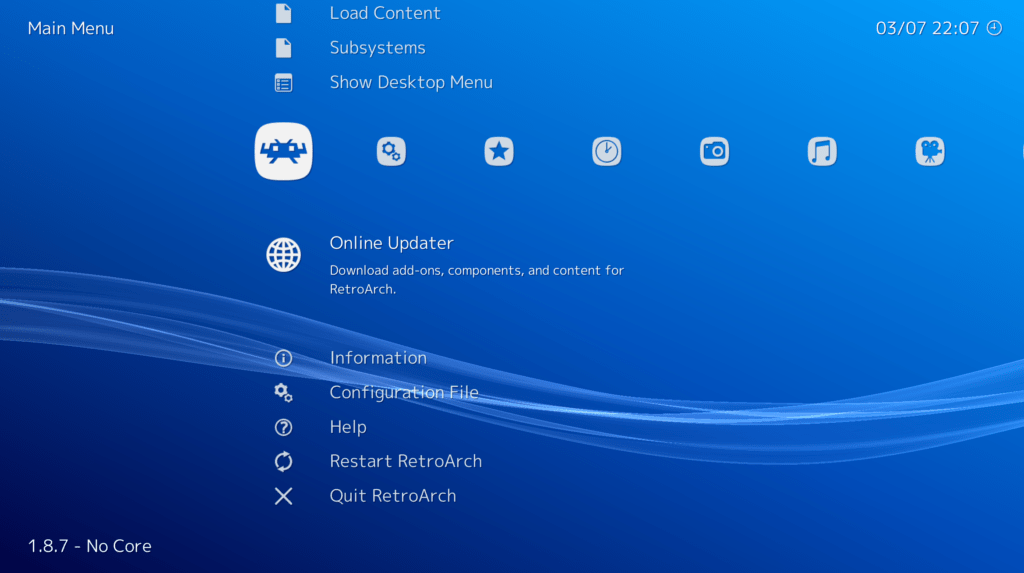
Once you’ve downloaded the core goes back to the main menu and scroll down to ‘Online Updater’. Here we are going to select ‘Update Core Info Files’ and ‘Update Databases’ to ensure everything is as up-to-date as possible relating to the emulator core. (This is especially useful if you had already downloaded Mupen64Plus previously).
Next, quit and restart RetroArch
Step 2 – Scan for N64 Games & Create a Playlist
We are now going to get RetroArch to scan your N64 games to make them easily accessible.
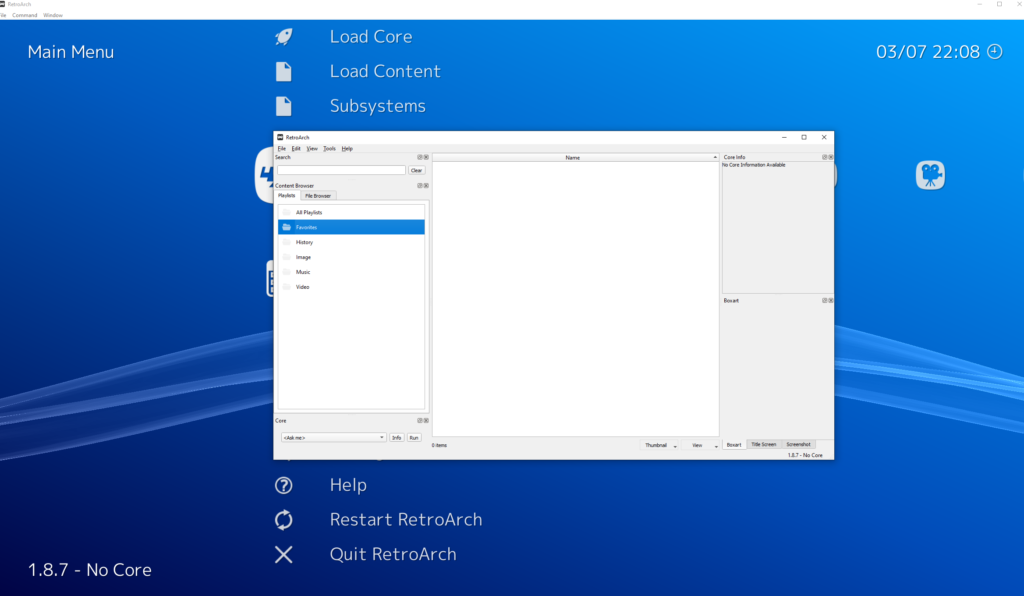
On the main RetroArch menu, select ‘Show Desktop Menu’ this will display the desktop window where it is easier to access some more of the set-up options.
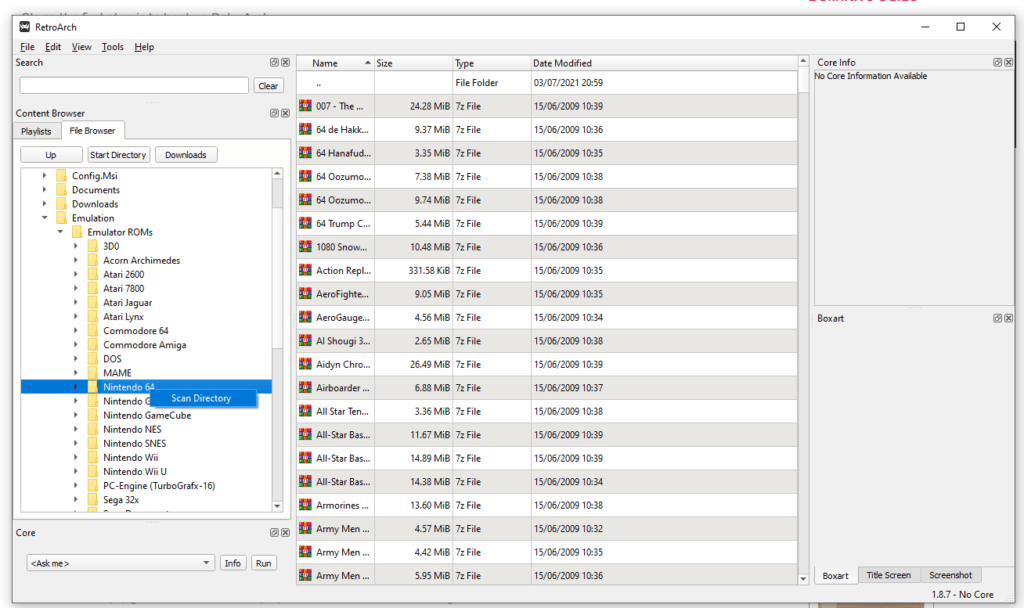
Next, locate your N64 games via the File Browser tab and then right-click and select ‘Scan Directory’. Go back to the Playlists tab and you will now see a Nintendo 64 playlist has been created along with your games.
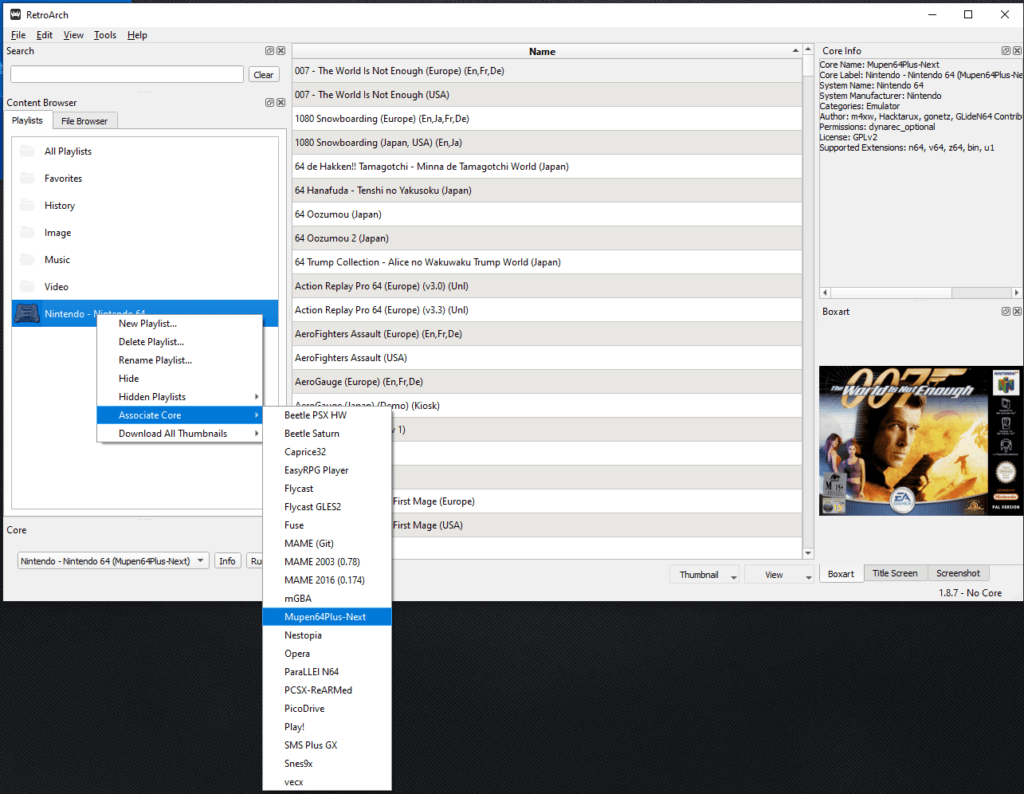
Step 3 – Set Default N64 Emulator
We now want to let RetroArch know which emulator core to use when playing N64 games by default, so right-click on the N64 playlist, go to ‘Associate Core’ then select Mupen64Plus.
Step 4 – Download Box Art Thumbnails
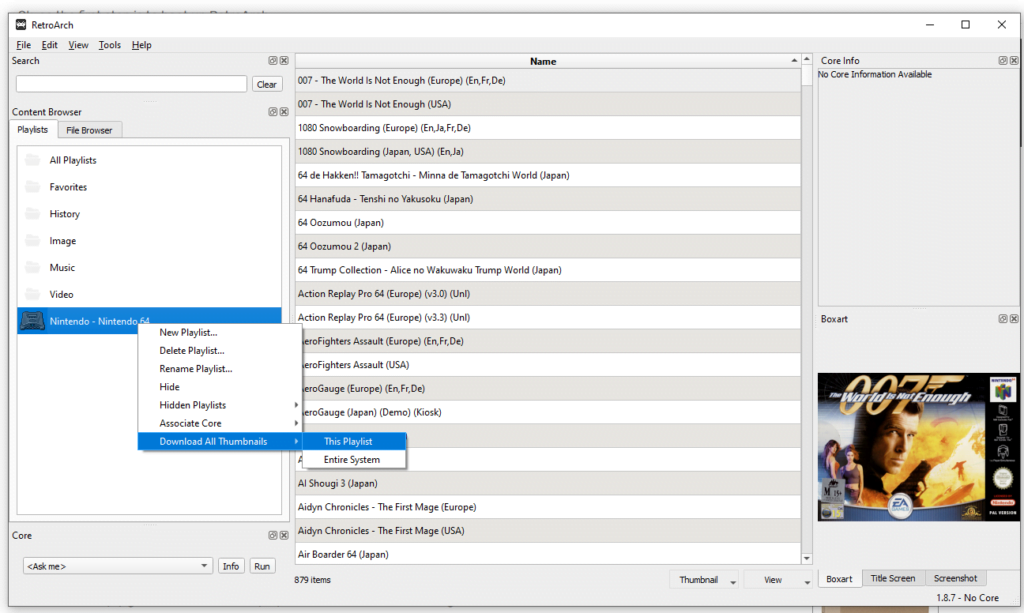
If you want to download thumbnails including the box art which is visible on the RetroArch frontend you select games, then simply go to the Nintendo 64 playlist that has been created, right-click and select ‘Download all thumbnails’ then for ‘This Playlist’.
It is advisable here if you have a lot of games imported, then it can take some time to download all of the thumbnails, so you may decide to do this later.
Now we’re ready to play!
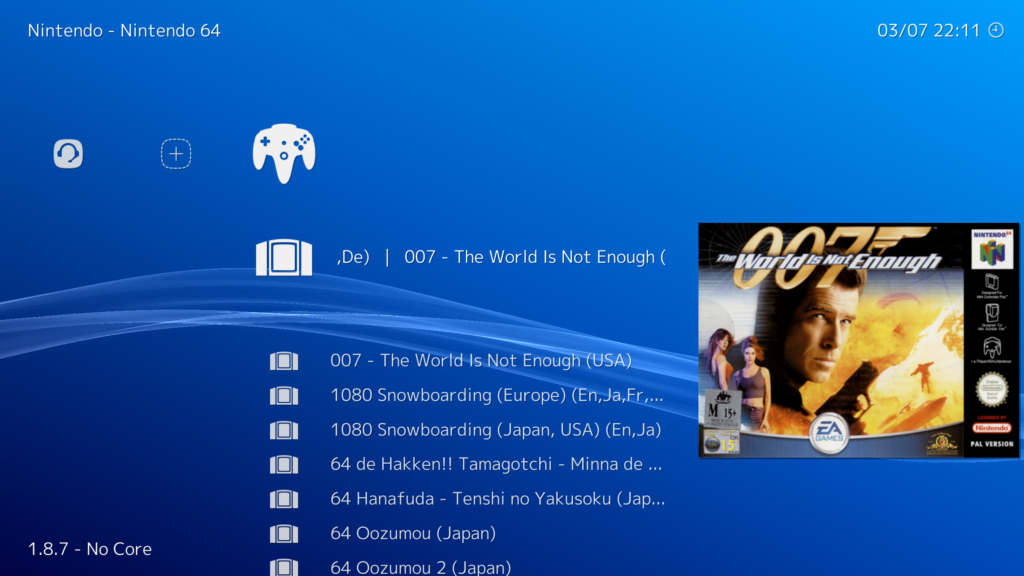
Step 5 – Choose A Game To Play
Close down the desktop menu and go back to the RetroArch frontend. Scroll across to the right and you will see the N64 playlist that has been created along with your games.
To boot a game, select a game and press ‘Run’ to start the game.
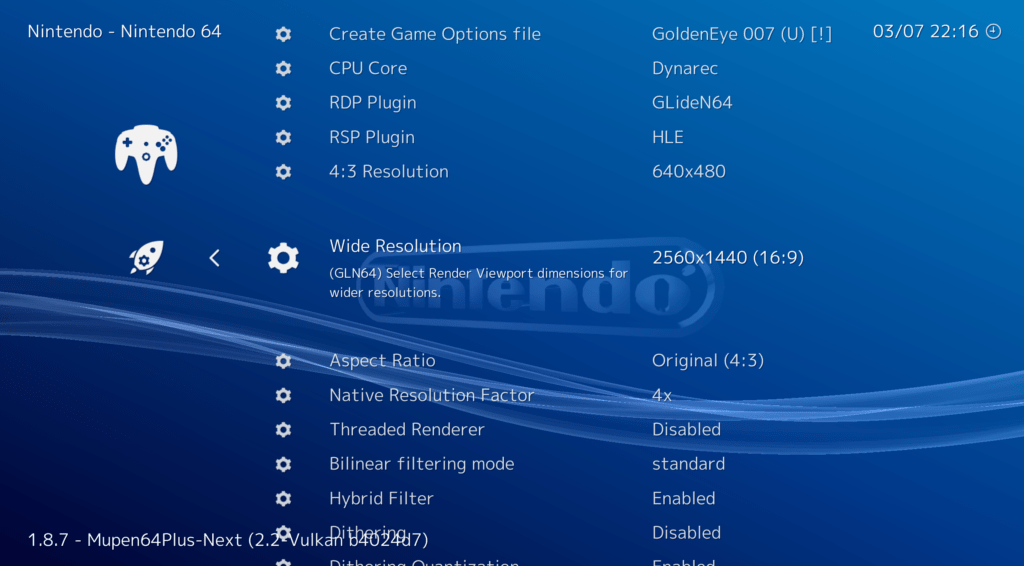
Step 6 – Upscaling Resolution & Additional Options
Press F1 to suspend the game and go back to the RetroArch menu, you will find here lots of useful tools and features, such as save states, control options, shaders, and emulator options.
Since this is emulation, we can benefit from increasing things such as the render resolution and anti-aliasing in the games.
If you select options, you will find a huge list of options relating to the emulator. We won’t go into detail here, but as a quick win, you can easily upscale and improve the appearance of your N64 games by increasing the resolution and also applying anti-aliasing.
As a quick example, I’m going to increase the resolution, for my screen as well as increase the native resolution factor to 4x, then increase the MSAA anti-aliasing to 8.
One option I will suggest changing is the RDP Plugin, change this to Angrylion to ensure the best compatibility. I found for example Mario Kart 64, using GLideN64 as the plugin meant I could not see what options I had selected on the title screen, Angrylion resolved this issue, so could help with a number of other glitches too.
We’ll just need to quit RetroArch and reload for the changes to take effect. Now when you reload your game, you’ll see a noticeable difference in the graphics.
And that’s it, you’ve got all you need in place to enjoy all your favourite N64 games from RetroArch!
N64 RetroArch Set Up Video Guide

A lifelong avid gamer and computing enthusiast, Matt has decades of Retro Gaming experience. Now over 40 years old, Matt now even considers himself retro, but fortunately, nobody has developed a Matt emulator (not yet at least!).